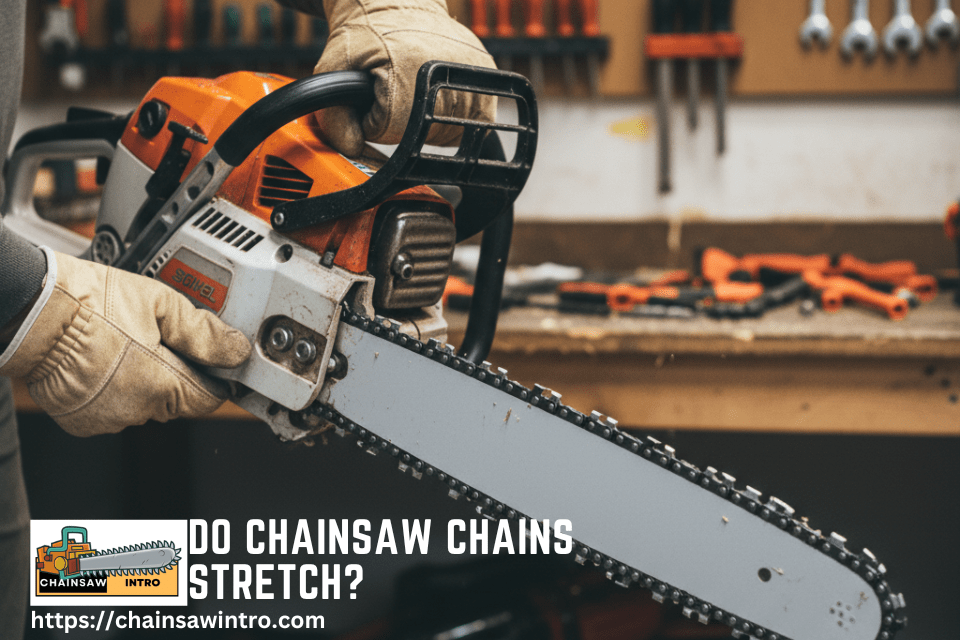

Here is a scenario almost every chainsaw owner has faced: you are mid-cut when the chain starts feeling loose and sloppy — or worse, it derails completely. Sound familiar? The culprit is almost always a stretched chain. This guide explains exactly why chainsaw chains stretch, how to spot it, when to replace it, and how to slow it down.
Chainsaw chain stretch is one of the most misunderstood maintenance issues in the world of outdoor power equipment. Many people assume a stretched chain is broken — but in most cases, it is a completely normal and manageable occurrence. The key is knowing what to look for and what to do about it.
Let us cut through the noise (pun intended) and get you the answers you need.
Yes, Chainsaw Chains Do Stretch — Here’s Why
Short answer: absolutely yes. Chainsaw chains stretch as a natural consequence of how they are built and how they operate. But here is the part that surprises most people — they do not stretch like a rubber band. The chain links do not physically elongate.
What actually happens is much more mechanical: the tiny pins and rivets connecting each drive link gradually wear down through friction and heat. As those connection points get slightly smaller from wear, the total accumulated play across all 60 to 80+ links adds up — and the chain appears to have grown longer. This is what professionals call wear elongation.
| Quick Fact: A typical chainsaw chain has between 56 and 84 drive links. Even 0.5mm of wear at each rivet connection can add up to 3-4cm of total chain elongation — enough to cause dangerous derailment. |
Why Do Chainsaw Chains Stretch? The 6 Real Causes
Understanding why chains stretch is the first step to slowing it down. Here are the six most common causes, ranked from most to least common:
1. Insufficient Lubrication
This is the number one cause of premature chain stretch. When bar oil runs low — or worse, runs out — the chain runs metal-on-metal against the bar rail. Friction skyrockets, heat builds instantly, and the rivets and drive links wear down at an accelerated rate. Always check your oil reservoir before every cutting session.
2. Heat Buildup During Heavy Cutting
Metal expands when hot. During sustained cutting — especially through hardwood or frozen wood — your chain heats up significantly. Thermal expansion temporarily adds slack. Even after cooling, the wear that occurred during the hot cutting period leaves the chain permanently longer than before.
3. Incorrect Chain Tension at the Start
Starting a cutting session with a slightly loose chain is a fast track to accelerated stretch. A loose chain vibrates excessively, snaps against the bar, and creates uneven wear patterns across the rivets. Always set proper tension before you start — the chain should pull away from the bar slightly but snap back firmly.
4. Dull Chain Teeth
A dull chain requires far more force to cut through wood. That extra force means more load on every rivet connection, more friction, and faster wear elongation. Keeping your chain sharp is not just about cutting performance — it directly prevents premature stretching.
5. Cutting Dirty or Abrasive Materials
Dirt, sand, or grit embedded in logs — especially those lying on the ground — acts like sandpaper on the chain’s metal components. Even a few minutes of cutting through gritty material can accelerate wear that would normally take hours of clean cutting to accumulate.
6. Age and Overall Wear
No chain lasts forever. With regular use, even a perfectly maintained chain on a well-lubricated bar will eventually stretch beyond usable limits. Most quality chains last through two to three sharpenings before elongation becomes a safety concern.

Credit: backyardgadget.com
Fast Facts: Chainsaw Chain Stretch at a Glance
| FACT | DETAIL |
| What actually stretches? | Rivets and pins wear down — not the links themselves |
| Average break-in stretch | New chains stretch 3-5mm in the first hour of use |
| Replacement threshold | Replace when 0.3% or more elongation is measured |
| Drive links per chain | Typically 56-84 links depending on bar length |
| Top stretch cause | Insufficient bar and chain lubrication |
| Chain lifespan (well-maintained) | 2-3 sharpenings before elongation is a concern |
| Early warning sign | Chain visibly sags below the guide bar during use |
| Best prevention method | Top up bar oil before every session, tension check always |
How to Tell If Your Chain Has Stretched Too Far!
Not sure whether your chain is just slightly loose or genuinely worn out? Here are the signs to watch for:
- The chain sags visibly below the guide bar when the saw is running
- You are retensioning more than two or three times per cutting session
- The drive links are pulling away from the bar rail sprocket teeth
- The chain derails off the bar during normal use — even after tensioning
- Cutting performance has dropped noticeably with no change in sharpness
- The tensioning screw has reached its maximum adjustment and the chain is still loose
| Pro Tip: The snap-back test. Grip the chain on the top of the bar and pull it away from the bar. A correctly tensioned chain should pull away about 3-4mm and snap back firmly. If it pulls more than 6-7mm and does not snap back, your chain is too stretched to safely continue using. |
New Chain vs Stretched Chain: Side-by-Side Comparison
| COMPARISON POINT | NEW / GOOD CHAIN | STRETCHED CHAIN |
| Chain tension | Stays set for full session | Needs constant adjustment |
| Drive link fit on bar | Sits cleanly in groove | Pulls away from groove |
| Cutting performance | Fast, clean, precise | Slow, rough, inefficient |
| Safety risk | Low with proper use | High — risk of derailment |
| Visual sag below bar | None at operating speed | Visible sag present |
| Vibration level | Smooth at operating RPM | Excessive — causes fatigue |
5 Proven Ways to Slow Down Chain Stretch
You cannot stop chain stretch entirely — it is a physical inevitability of metal-on-metal operation. But you can dramatically slow it down with these five maintenance habits:
- Always fill bar oil before cutting. Never run the saw without confirming the reservoir is topped up. Most cuts take longer than you expect.
- Check and set chain tension before every session. A well-tensioned chain wears evenly; a loose one wears unevenly and stretches faster.
- Keep your chain sharp. A sharp chain cuts with less force, which means less strain on the rivets and slower wear elongation.
- Avoid cutting dirty logs. If a log has been on the ground, the bark may be full of grit. Clean the contact area if possible before cutting.
- Let the saw cool between heavy cuts. Extended cutting through dense hardwood generates heat that accelerates rivet wear. Short breaks help.
| Remember: New chains always stretch noticeably in the first 30 minutes of use as the rivets seat themselves. Check tension every 5-10 minutes during break-in. This is completely normal — not a sign of a defective chain. |
Frequently Asked Questions
Q1: How often should I check my chainsaw chain tension?
Check tension before every cutting session and every 20-30 minutes during extended use. New chains should be checked every 5-10 minutes in the first hour of use due to initial break-in stretch. A quick tension check takes less than 30 seconds and can prevent a dangerous derailment.
Q2: Can I re-use a stretched chain if I retension it?
If the chain is only slightly stretched, retensioning may allow a few more cuts safely. However, once the tensioning screw reaches its maximum adjustment range and the chain still feels loose, the chain must be replaced. Continuing to run a worn-out chain risks dangerous kickback, derailment, or damage to the guide bar.
Q3: Does the type of wood I cut affect how fast my chain stretches?
Yes, significantly. Hardwoods like oak, hickory, and maple create more cutting resistance, generate more heat, and put more load on the chain’s rivet connections — accelerating wear elongation compared to softer woods. Cutting frozen or wet wood also increases stress on chain components.
Q4: Is a brand-new chain supposed to stretch quickly at first?
Absolutely — this is completely normal and expected. New chains go through a break-in period in the first 30 to 60 minutes of use where the rivets and links seat themselves. During this period, you may need to retension the chain three or four times. After break-in, the chain should hold tension much more consistently between sessions.
Q5: How do I know when it is time to replace rather than retension?
Replace your chain when any of these are true: the tensioner screw is maxed out and the chain is still loose; drive links are pulling visibly off the bar rail; the snap-back test shows more than 6mm of pull with no return; or the chain has been sharpened down to the minimum depth gauge height. When in doubt, a new chain is far cheaper than a new guide bar.
Ready to Stop Fighting a Stretched Chain?
A well-maintained chain is the difference between a saw that works for you and one that works against you. Now that you know exactly why chainsaw chains stretch, what signs to look for, and how to slow it down — you are better equipped than most chainsaw owners out there.
Do not wait for a derailment to tell you the chain is done. Be proactive: check your tension, keep your oil topped up, sharpen regularly, and replace when the stretch crosses the safe threshold.
Take Action Today
Bookmark this guide. Share it with a fellow chainsaw owner.
Check your chain tension right now before your next cut.
Browse our top-rated replacement chains on AmazonYour saw deserves a chain that keeps up with the work.
Explore Related posts:
 How Long Does a Chainsaw Bar Last?
 Why Is My Chainsaw Smoking?
 Can Chainsaws Be Stored Vertically? Pros, Cons & Best Storage Practices
 How to Know If Your Chainsaw Bar Is Worn Out? Signs, Tips & Replacement Guide
 How to Tell If Your Chainsaw Sprocket Is Worn Out? Signs, Replacement & Maintenance Tips
 Why Is My Chainsaw Chain Not Spinning? Start With This One Question